
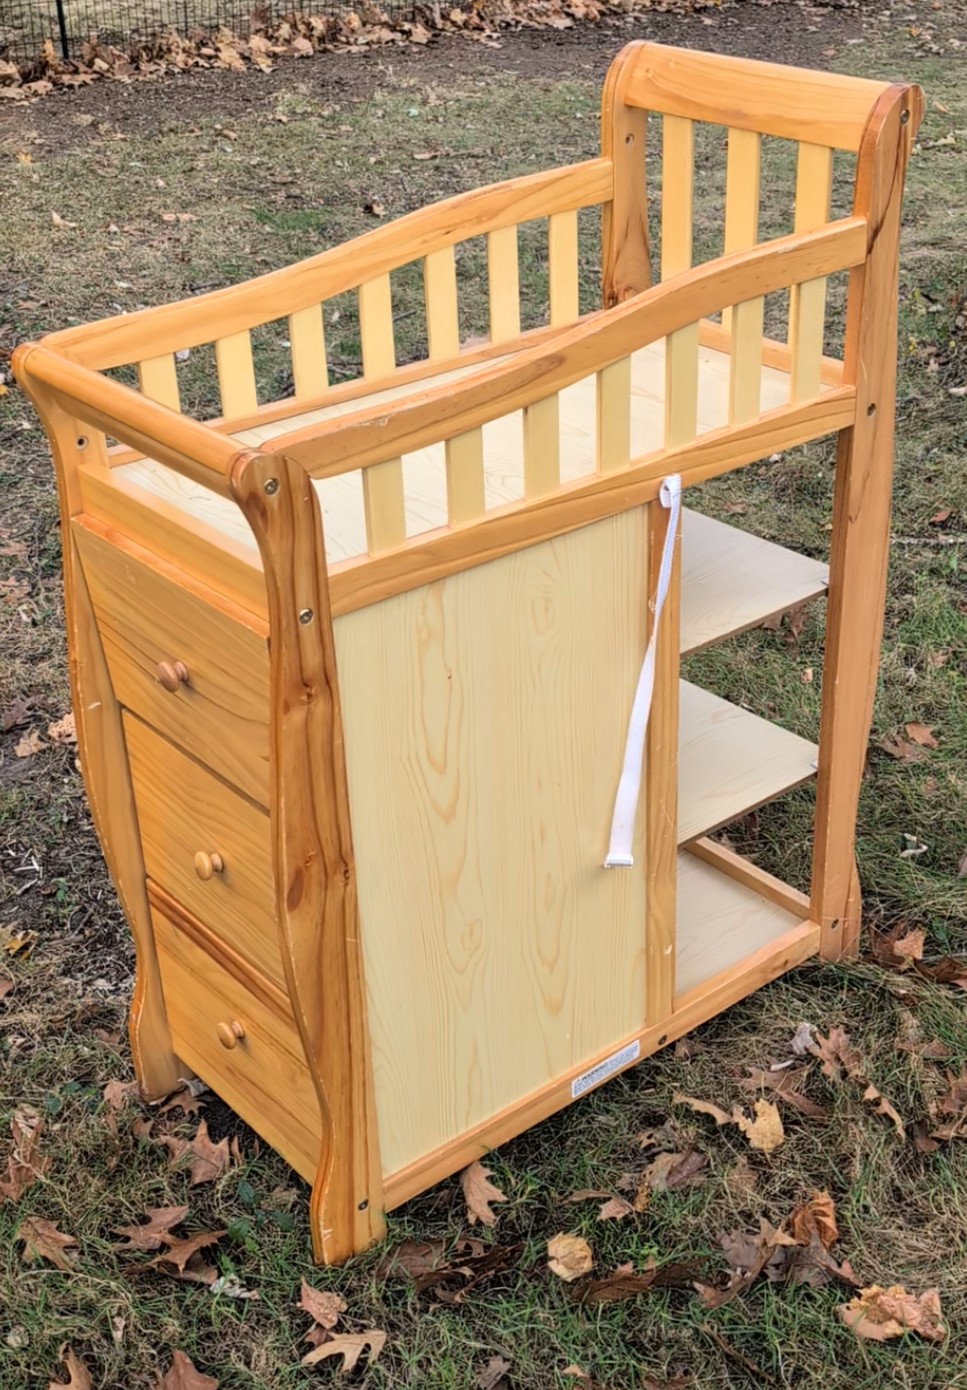
We stumbled upon this changing table at a local thrift store and I picked it up for $15. I immediately thought it would make a great kitchen cart for a small space. I’m so happy with the results. Here’s what we did to get there.
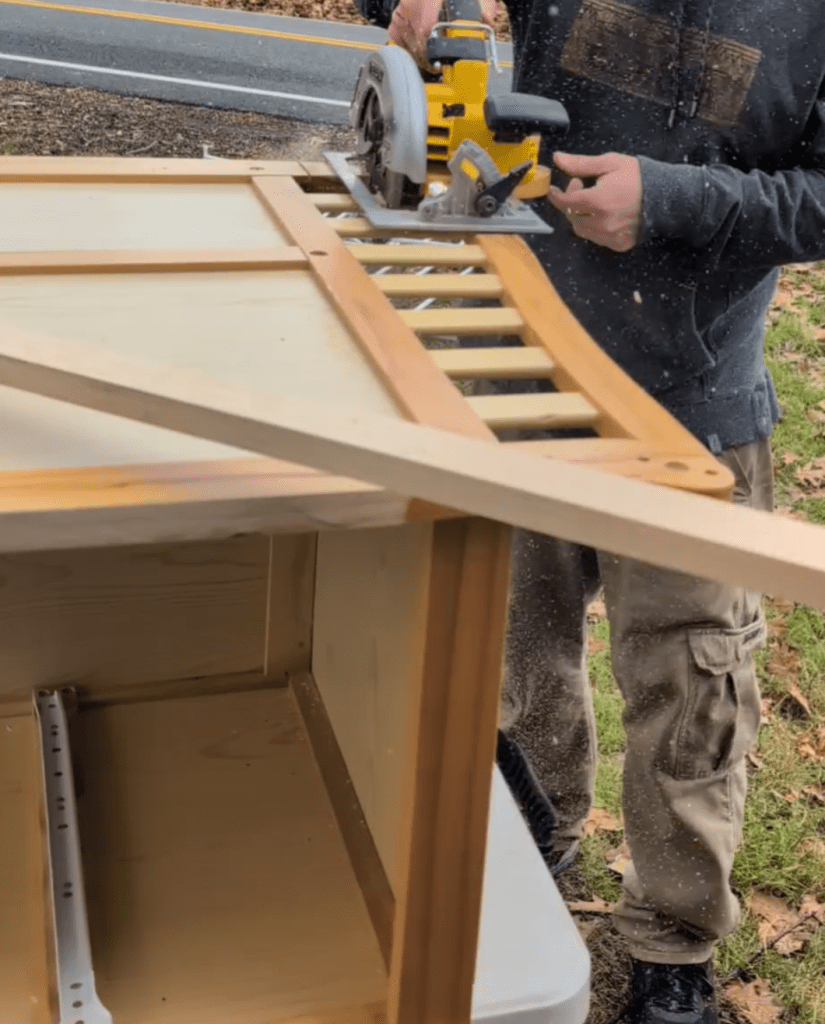

Jay used a circular saw to cut the top off. After the first cut, the side safety planks popped right out leaving a flat top edge for the new top. He trimmed the corners to match the sides. And then with a guide, drew a straight line along the back and front legs and cut those straight with the circular saw.
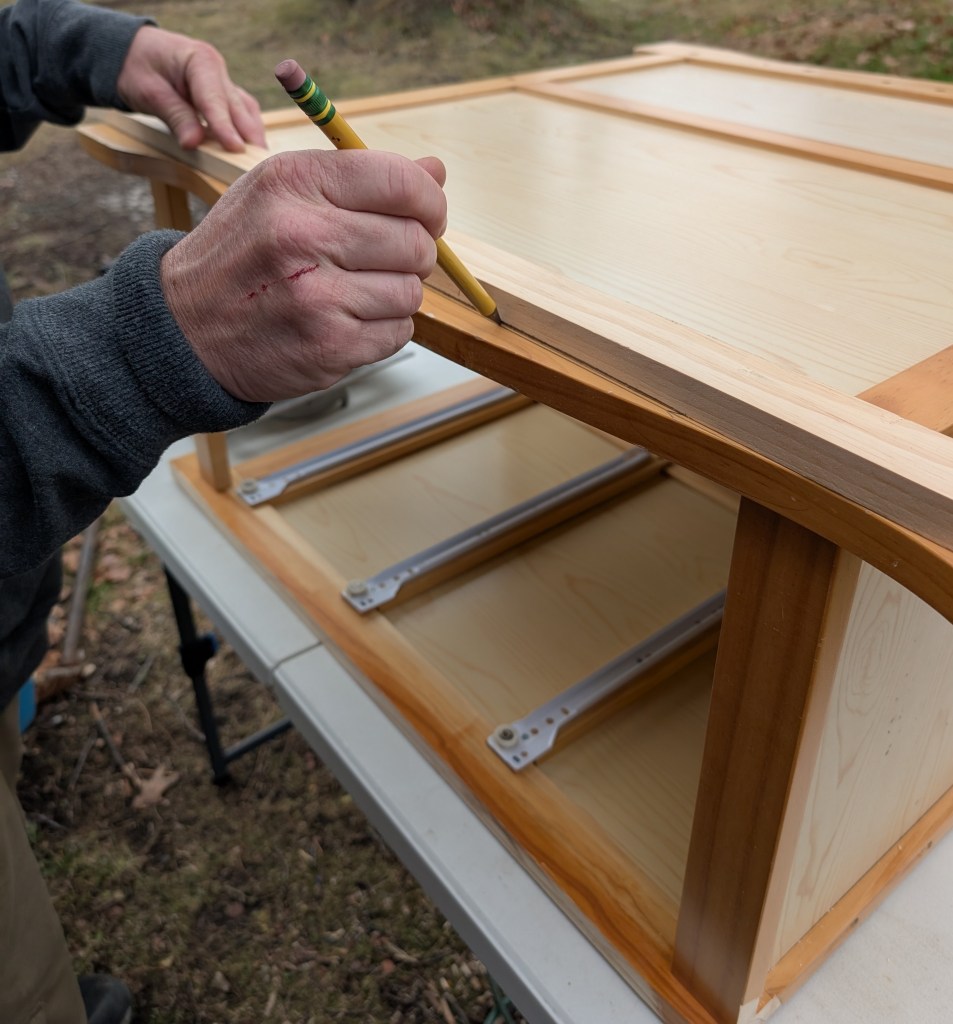
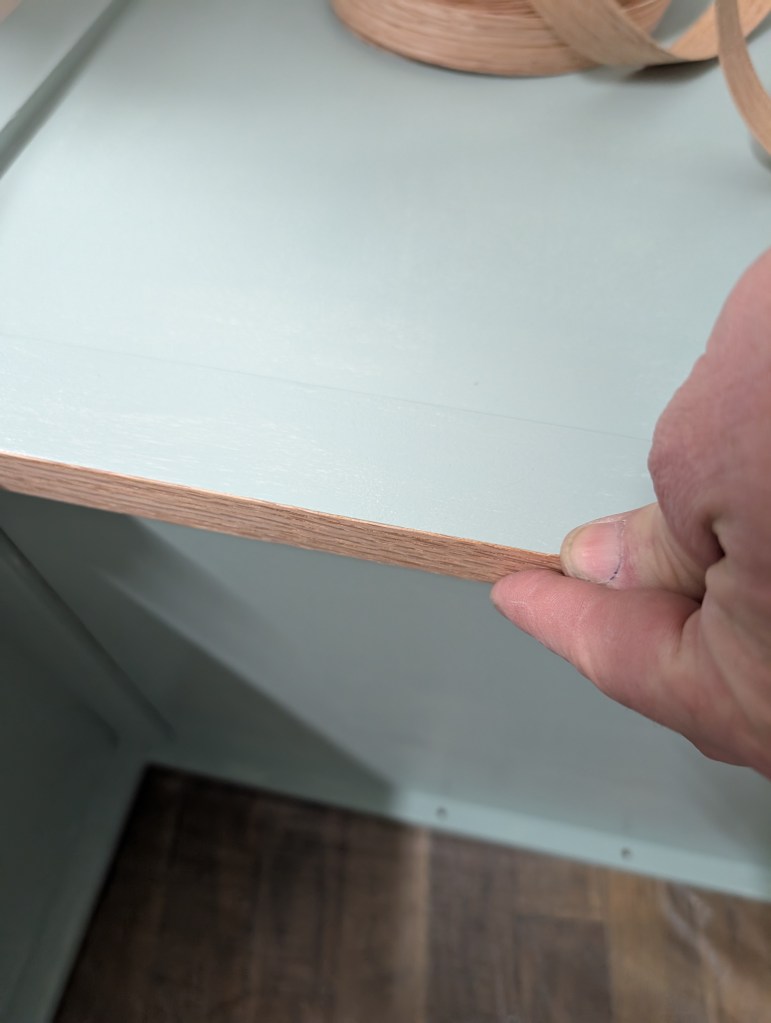
Knowing we would be putting wheels on the finished cart I wanted the shelves completely exposed to make it more functional. Jay removed the side panel that covered one side of the shelves with a reciprocating saw. Once he cut the panel, it popped right out. He used iron on banding to close the gap.
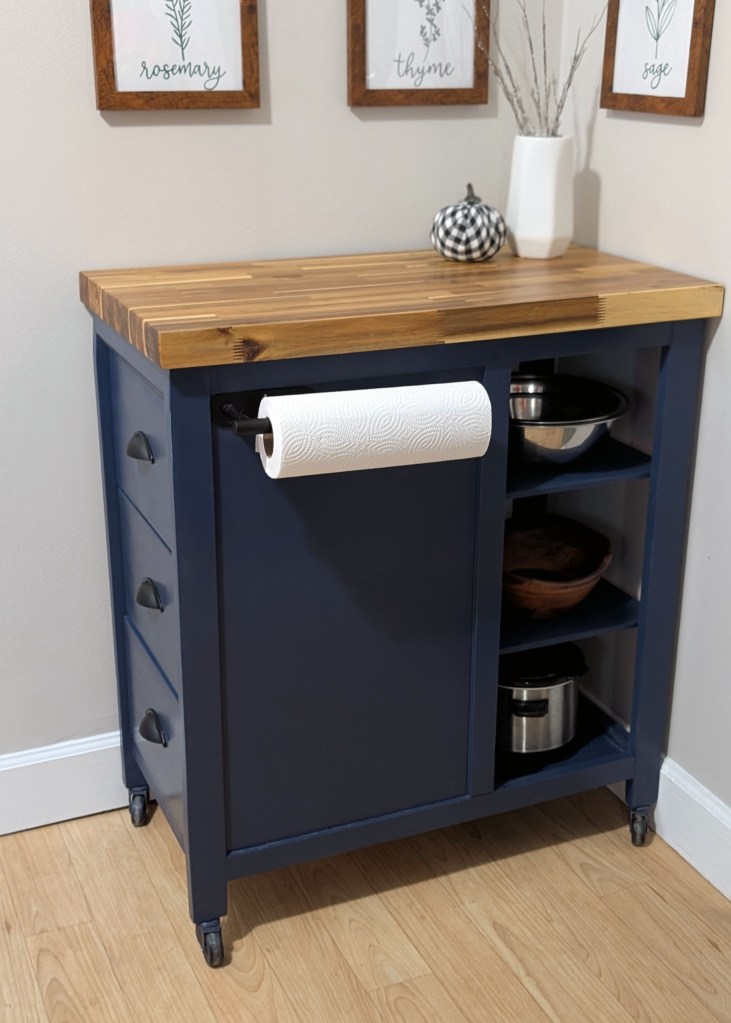
We originally painted the cart with Sherwin Williams cabinet and furniture paint in the 2025 color of year, quietude. I liked the color but I decided to repaint this later on when I decided to keep the cart for myself.
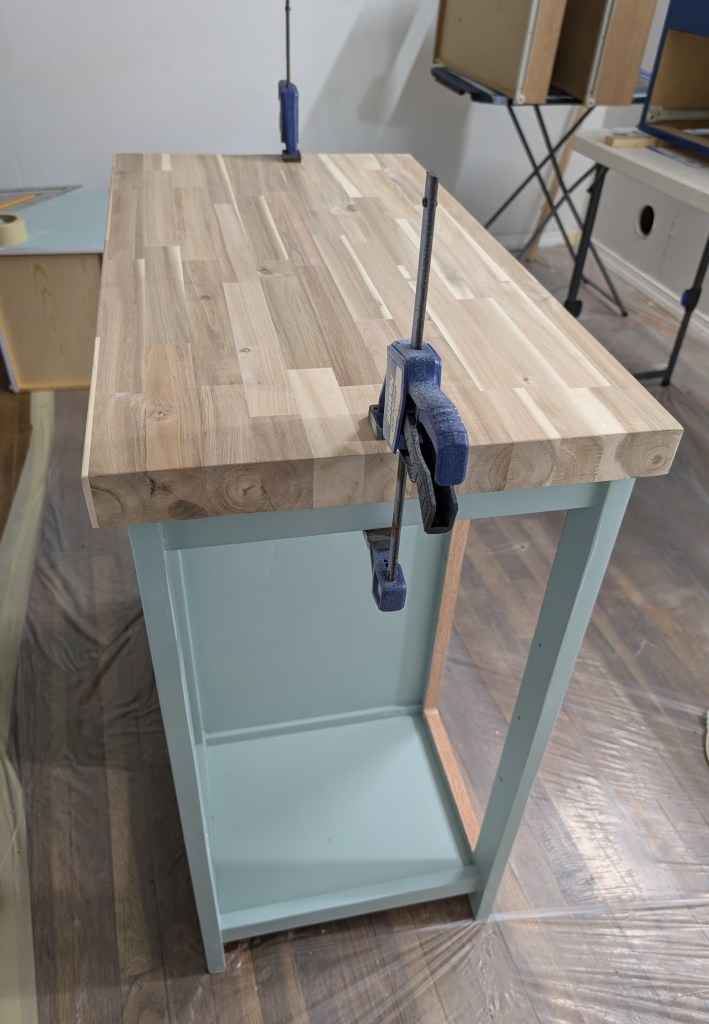
I purchased a piece of unfinished butcher block online. It took some shopping around to find a good deal. I’ll post the information below. Jay cut the butcher block to size and attached it to the top of the cart with wood glue and screws. He clamped it overnight.
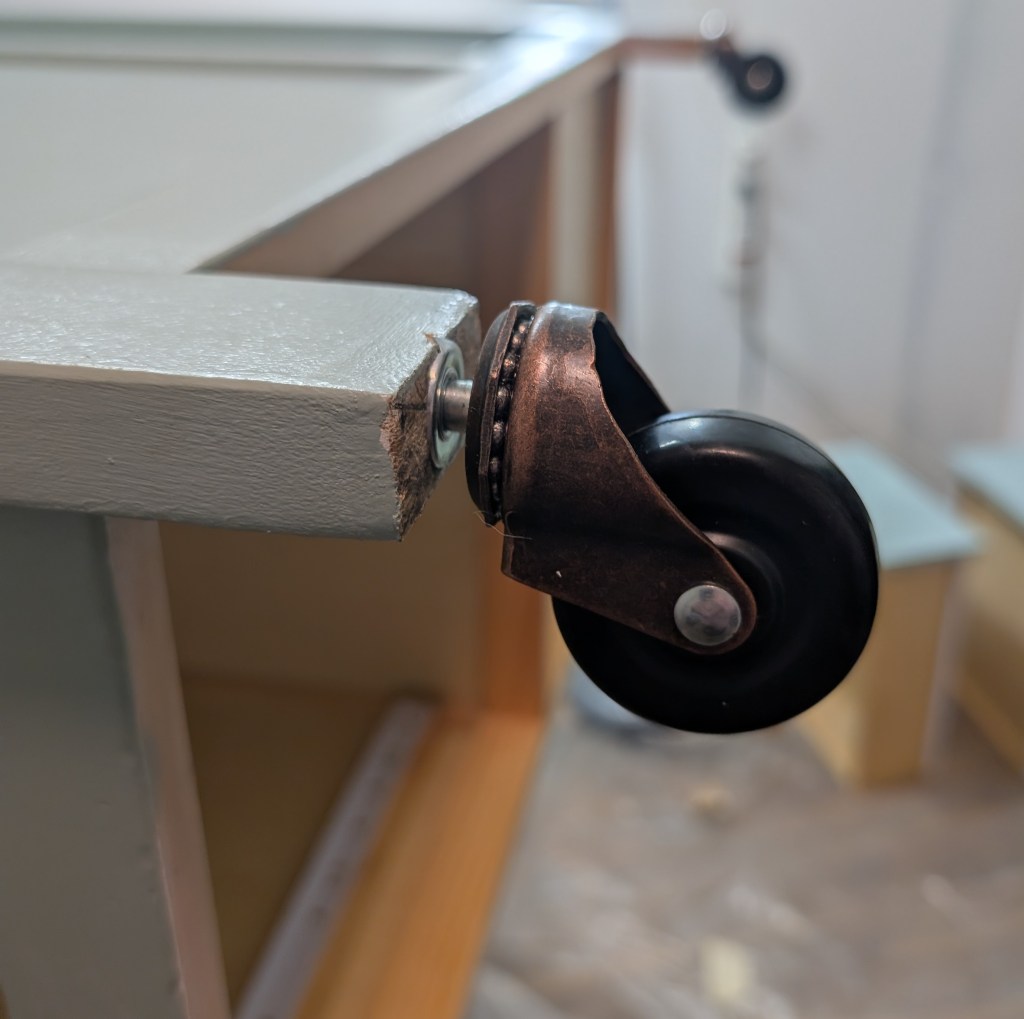
Jay added a castor wheel to each leg
We stained and sealed the butcher block and here’s the finished, repainted piece in my space. I added a paper towel roll holder to the side and absolutely love how useful this cart has been in my small kitchen/dining area.
Here’s a list of products we used with links to Amazon purchased products:
- Paint
- Top Coat
- 2″ Castor wheels (Ace Hardware)
- Drawer pulls (Home Depot)
- Acacia Butcher Block (Grizzly Industrial)
- Butcher Block Finish
- Repair Banding
- Wood Filler
- Wood Glue
- Paper Towel Holder


Leave a comment